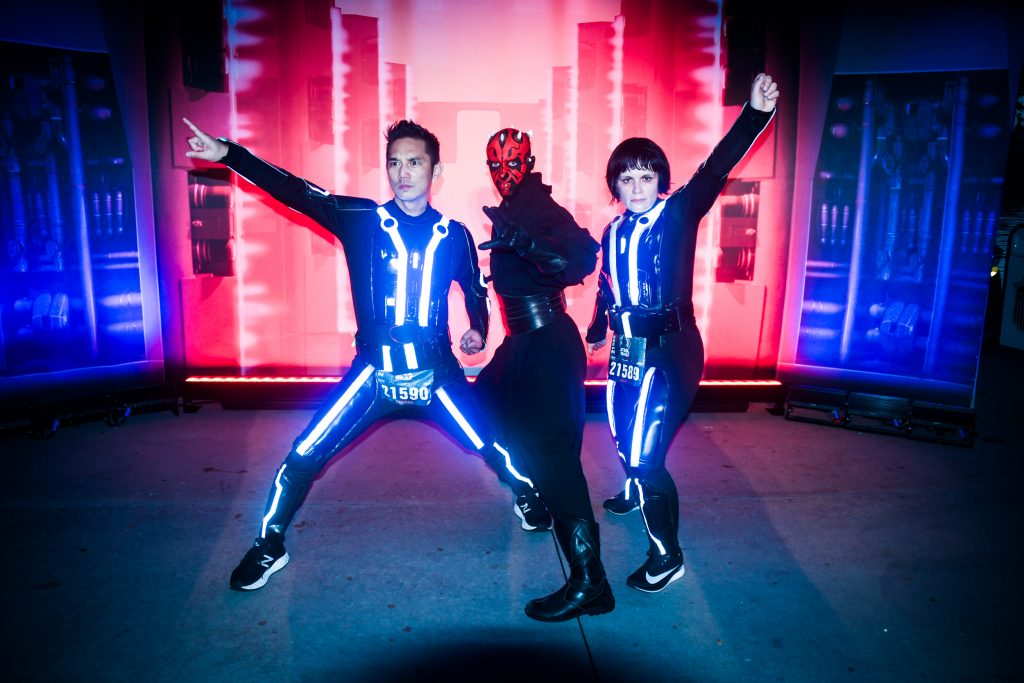
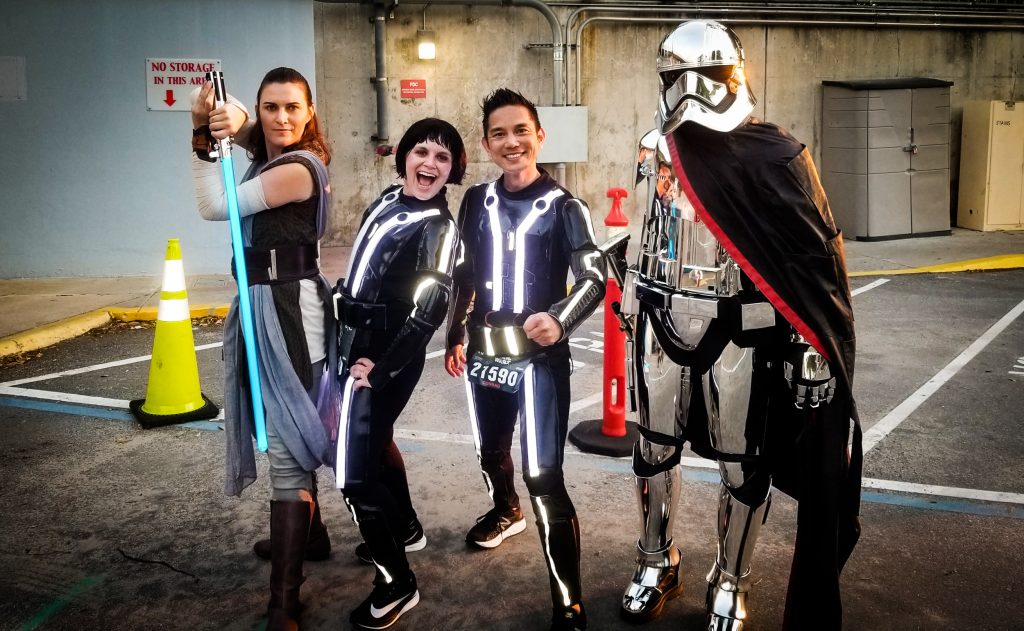
The Tron/Stormtrooper mashup was an idea we had while riding “The People Mover” last year during the Star Wars Dark Side Weekend. After a lot of research, we were able to get it to work this year for the Disney Star Wars 10K and they turned out awesome.


Challenges of this Costume
When doing research for this I saw many Tron costumes with EL tape or EL wire, but I noticed that it came with many downsides: it’s not very bright, it’s fragile and battery life is a problem. So I opted to go with LED lights, which is plenty bright and battery life can last forever. The only major challenges are learning how to solder and figuring out how to diffuse the light to make it look like a light strip rather than individual LED bulbs.
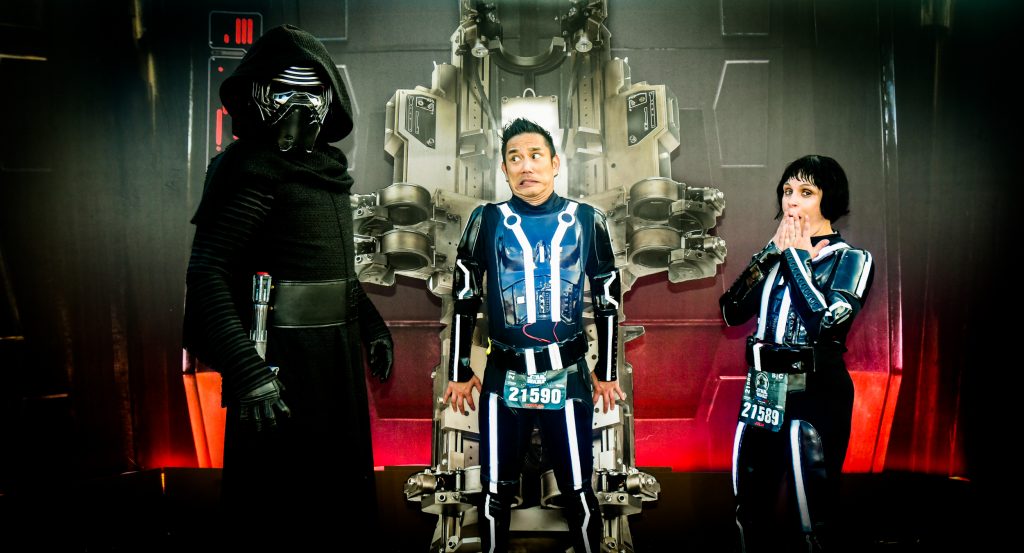
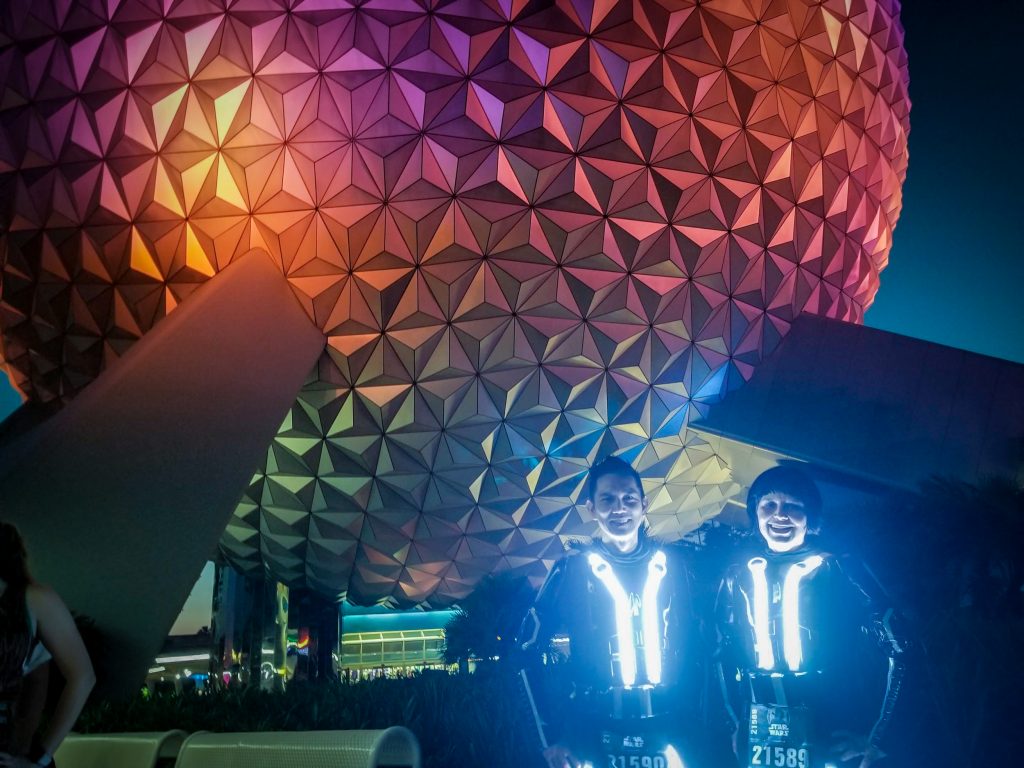
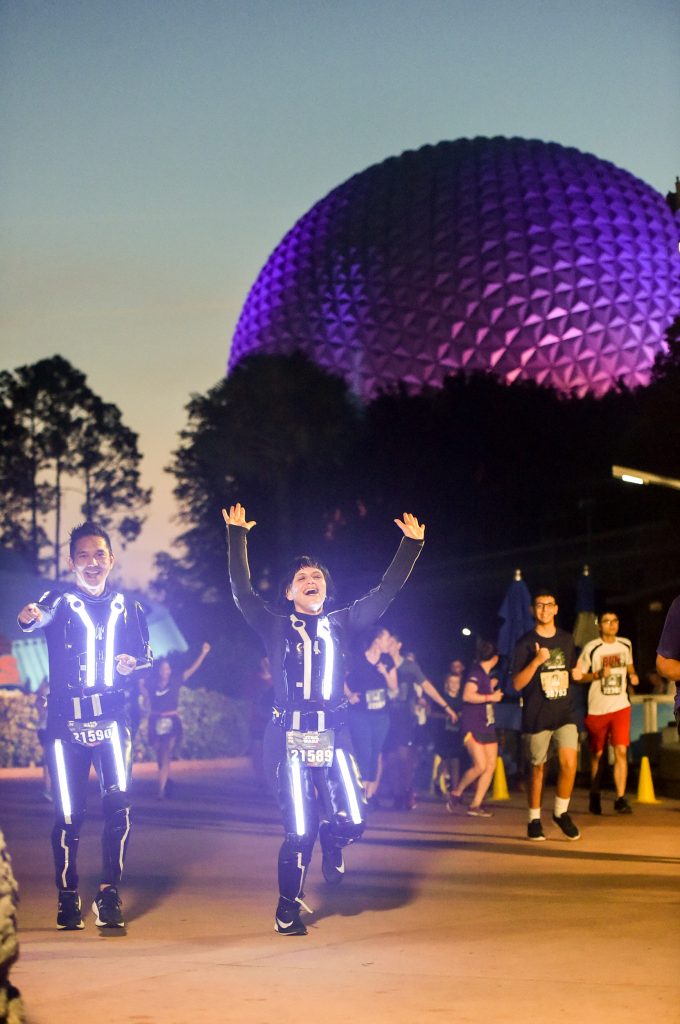
The first thing you’ll notice from the above photos is that LED lights are REALLY bright. Since most of the race happened before the sun came up, others can’t help but notice the two people lighting up the area.
As with any costume design, you first have to ask yourself, “What is your personal goal?” Meaning, do you care more about the photos or what it looks like in real life? You have to prioritize one.
Because this is a running event, not a cosplay competition, my priority was photos. So you have to understand that I absolutely do not care how the costume looked in real life – I only care about the photos. Which means I adopted the philosophy of…
“I only care how the costume looks from more than 10 feet away.”
This freed me up to ignore details or mistakes that you could only see up close.
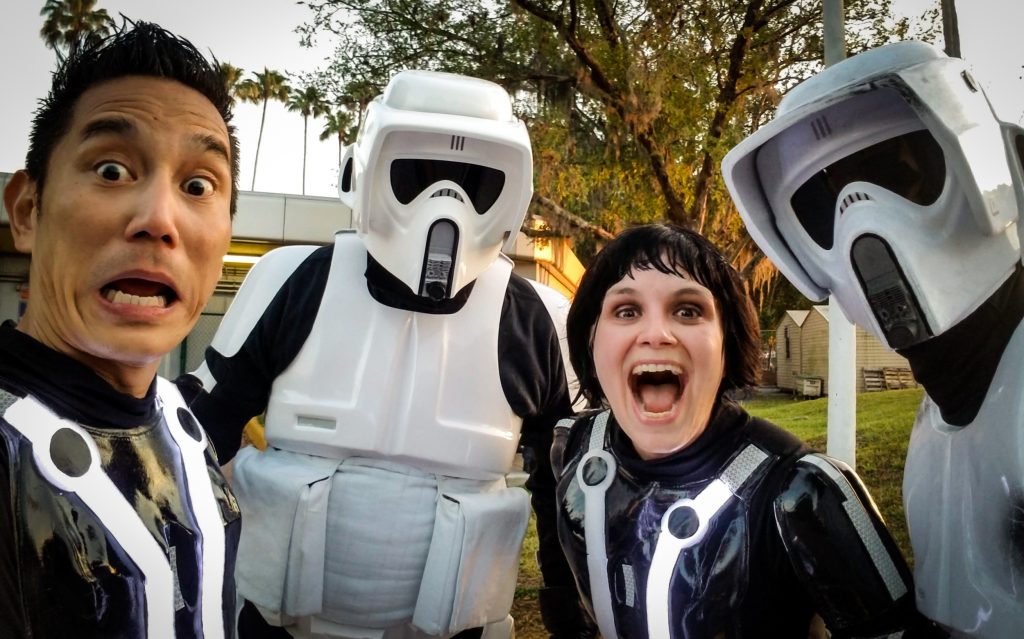
So about the costumes, I only used LED lights for the chest and thighs since it would be really hard to get the lights on the arms and shins. And this is where only caring about the photos come into play. I created the costumes specifically for our camera phone knowing we mainly use that for our social media. Meaning, it only needs to look good from more than 10 feet away and also it allowed me to use reflective tape for the parts I couldn’t get the LED lights to reach.
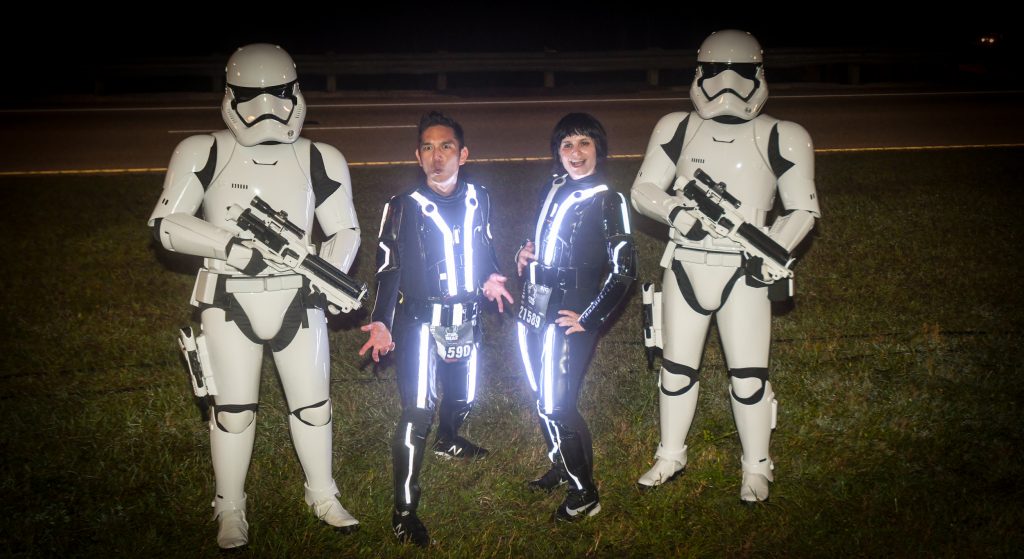
You’ll notice just how well it works in this photo after the sunrise. Look how well the LED strips still show up and how well the reflective tape reflects the camera flash. The white lights are the LED strips, the yellowish lights are the reflective tape.
DIY LED TRON COSTUME
Items
Stormtrooper Costume (Smaller version, bigger version)
– FlexiDip
– Black spray paint
– Glaze
Lights
– LED lights
– LED connectors
– Wire
– Battery pack
– Battery pack cord
– Soldering kit
– Heat Shrink 3/16″-3/32″ (see below, get from home improvement store)
– Heat Shrink 3/32″-3/64″ (see below, get from home improvement store)
Light Diffusing
– Picture frame packing foam (these are not the exact ones I got)
– Craft glue
Other
Reflective tape
Hot glue gun with glue
FlipBelt (to hold the battery pack)
Base Layer
We used a Stormtrooper costume since we did a Tron Stormtrooper mashup, but you could easily do this on any surface that has some rigidity.
So without getting into too much detail, painting a cheap foam Stormtrooper costume is really simple. The hardest part is the taping and pinning so you don’t get spray paint everywhere. And since the costume is unwieldy, I had to paint it in sections. Do the following steps for the legs, then arms then chest.
- Apply three layers of the FlexiDip spray paint to seal and give the foam more rigidity. Wait about 10-15 minutes between layers.
- Apply three layers of your color. In this case black. Waiting 10-15 minutes between layers.
- Apply three layers of the glaze. This is the difference between your costume looking like a shiny leather or hard plastic. Wait 10-15 minutes between layers.
Note: I would suggest waiting overnight to let that section cure before doing the next section because parts might stick together even if you put the done parts it in plastic. And you don’t want to leave parts in plastic for a long time unless they’ve had a few days to cure.
The Tron Look and Your Design
So before you lay it out let’s first talk about what makes Tron… Tron. It’s two things, little circle things and long continuous lines of light that travel from shoulders to feet. If you have those two things, you can mess with that formula and people will still recognize it as Tron.
I will advise you to NOT recreate the movie designs angle for angle because that would just be insane, and nobody actually remembers what the lines look like anyways, and most importantly… nobody cares.
When designing costumes you actually never design for movie/TV accuracy. First, design for what people think they remember and not a screen grab from a movie. Secondly, you design for what the camera will see and not what it looks right in real life. This means some colors or articles of clothing might be accurate but might get lost by a camera that’s 15 feet away from you.
Knowing this, notice our Quorra has two leg lights like everyone else. So I opted to do two leg lights because that’s what people would expect. However, not only do people not even know Quorra’s name, nobody knows she only has one leg light since people don’t carry a photo of her in their pocket. So only having one leg light, while accurate, to most people it would look like I screwed up.
And one major thing if this is for a running costume: make sure you know where you bib will go. There is no sense in designing for a spot that will be covered. Notice I didn’t design anything on the pelvis.
The Lights
The part you’ve all been waiting for – the LED lights.
I will preface this part by saying I did not know anything about LED lights, soldering, wires or batteries before this. But after doing it a few times, I got the hang of it, and it is nothing to be scared of. In fact, I can’t wait to put my new skills to use around the house.
Also, no the LEDs do not give off heat. I had them on for 4 hours straight while running a 10K and it’s probably no hotter than your phone display.
Credit: I got the foundation for my costume from this link where a dad threw together a last-minute LED stickman light costume for his kid in 2 hours for Halloween.
In its simplest form, the lighting is just this:
Four LED strips wired into one big wire that you in turn connect to a battery pack.
Seriously that’s it.
So let’s get a birds’ eye view of what will happen before we lay any of it out. We just want four LED strips wired to one battery. This really means taking all four positive wires, winding them into one fat wire and connecting that to the positive battery wire and doing the same for the negative wire. But to make all those wires reach, we need to attach extra wires to bridge the distance.
To connect wires we do what’s called ‘soldering’. This basically is like gluing two wires together by melting a drop of metal and letting it cool. It’ll scare you at first, but after the third time you do it, you’ll realize it’s no scarier than a hot glue gun or a curling iron. With all three, just be careful not to touch certain parts and remember to unplug it after use.
Then you use what’s called heat shrink to cover soldered part, which is a rubber that shrinks when you blow dry it. This protects your connection and give it strength.
This is what is looks like from a conceptual view…
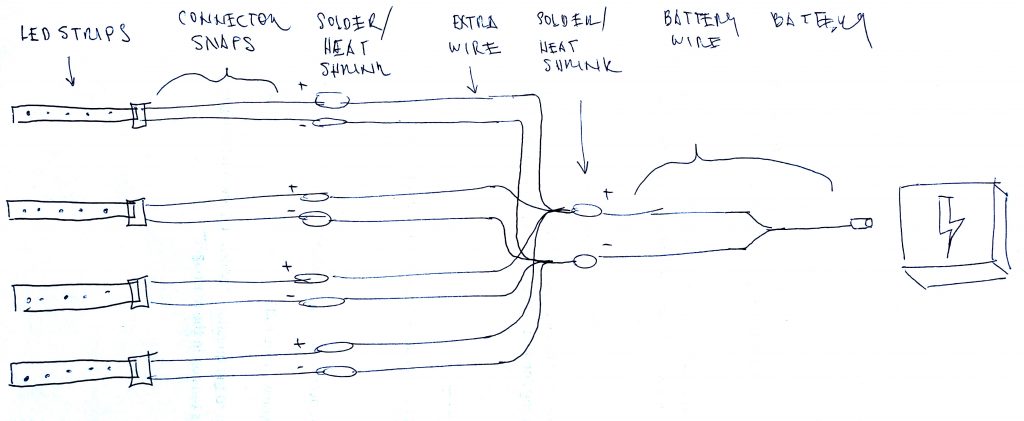
This is what you want all your wires to look like at the end…
Let’s Get Started
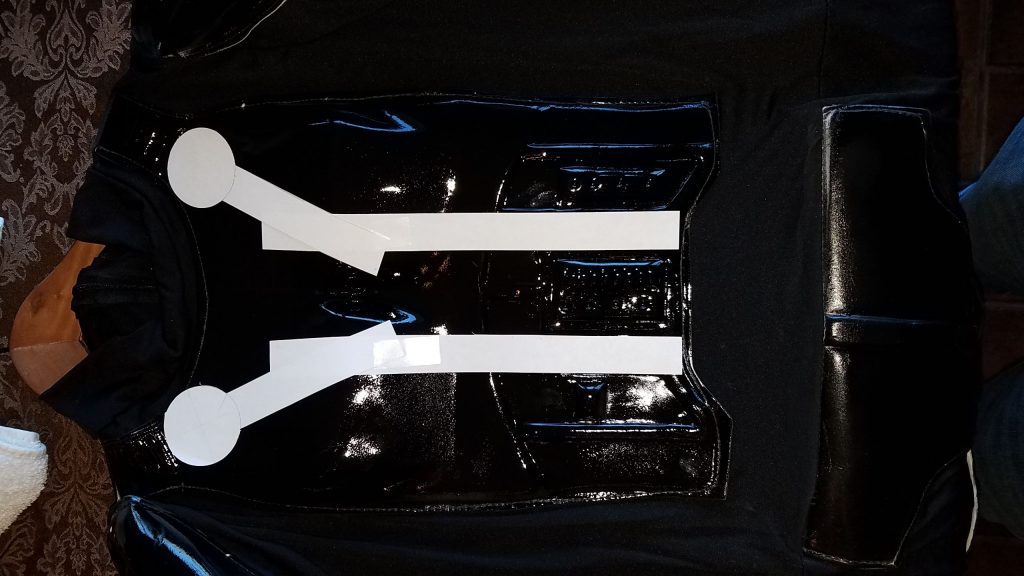
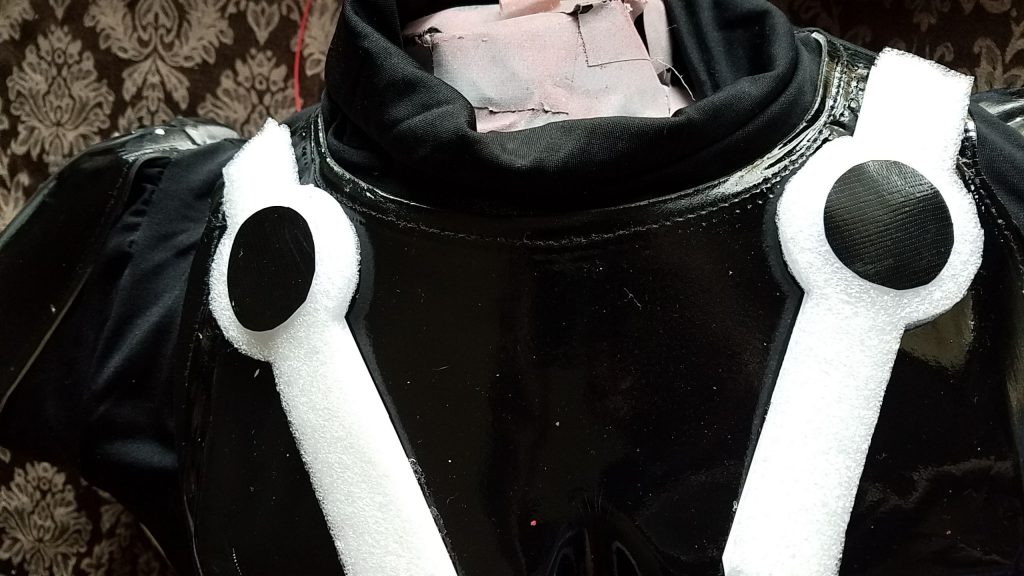
First, cut out on paper what you want your design to be. You will attach your LED strips to the paper, and then in turn hot glue that to the chest.
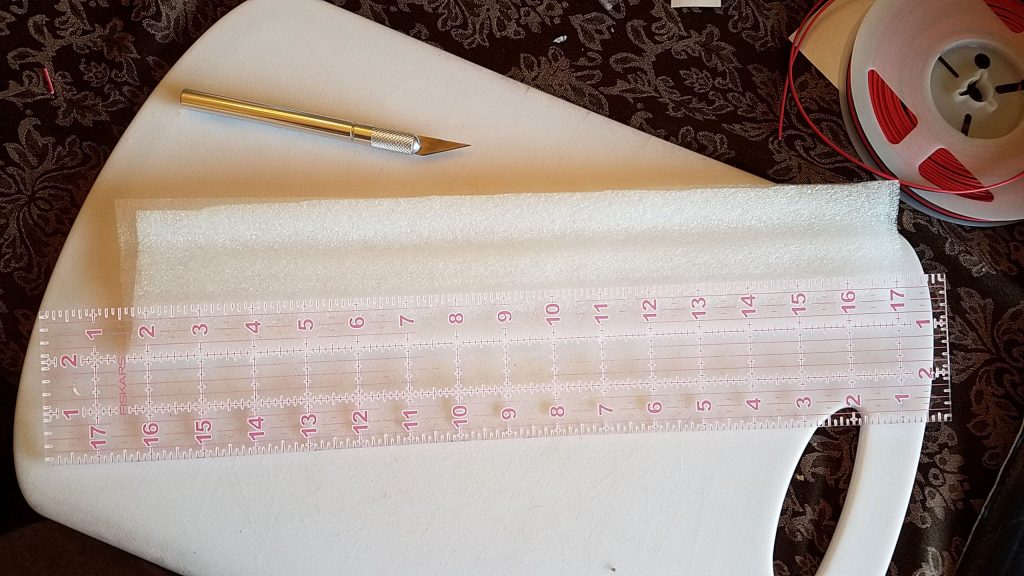
Make the strips to a 1 inch width.
I laid it out, used some tape, then cut the excess.
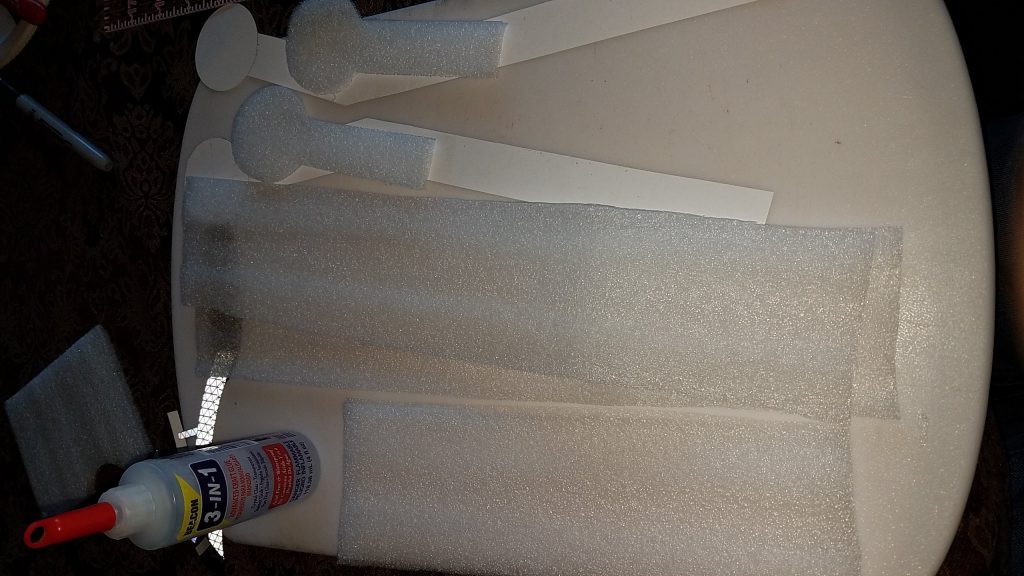
To diffuse the LED lights we’re using packing sleeves for picture frames. This is the magic step. No one else on the internet successfully figured out this step, so please if you use my tutorial, please link back here.
Glue two layers of the packing sleeve together, let it dry then cut them to match your design. Here’s a bunch of photos so you can get a general idea of what I did.
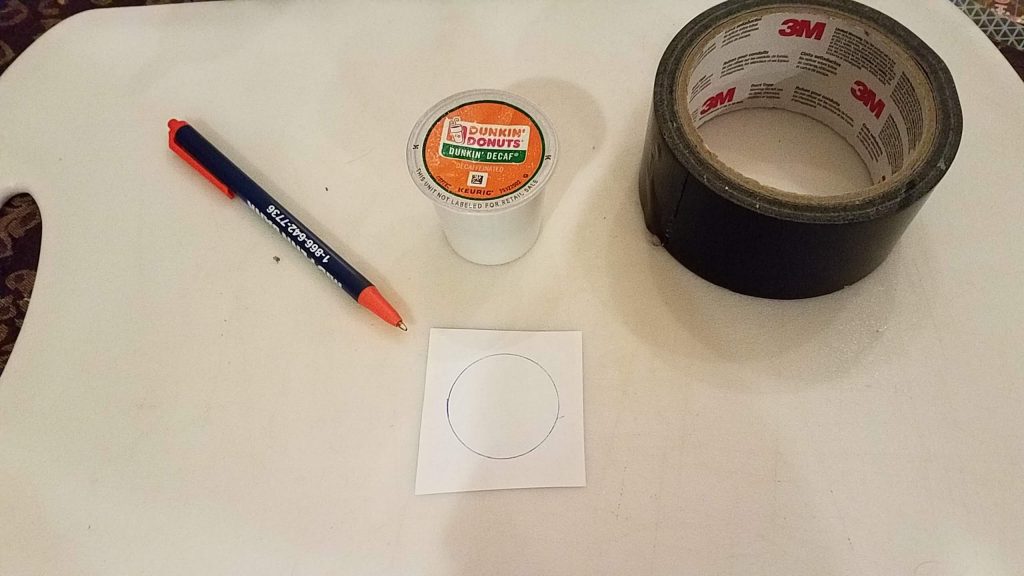
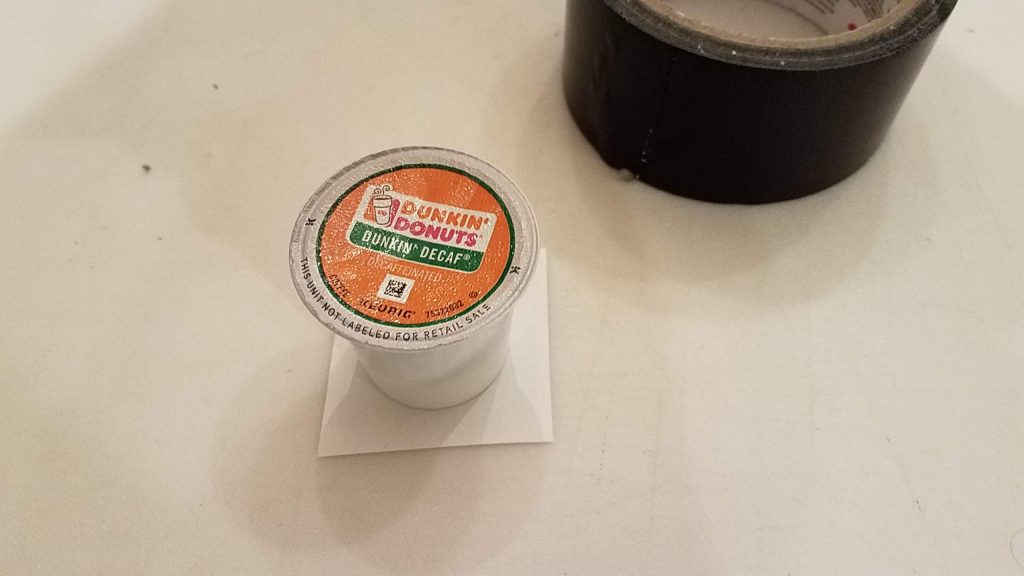
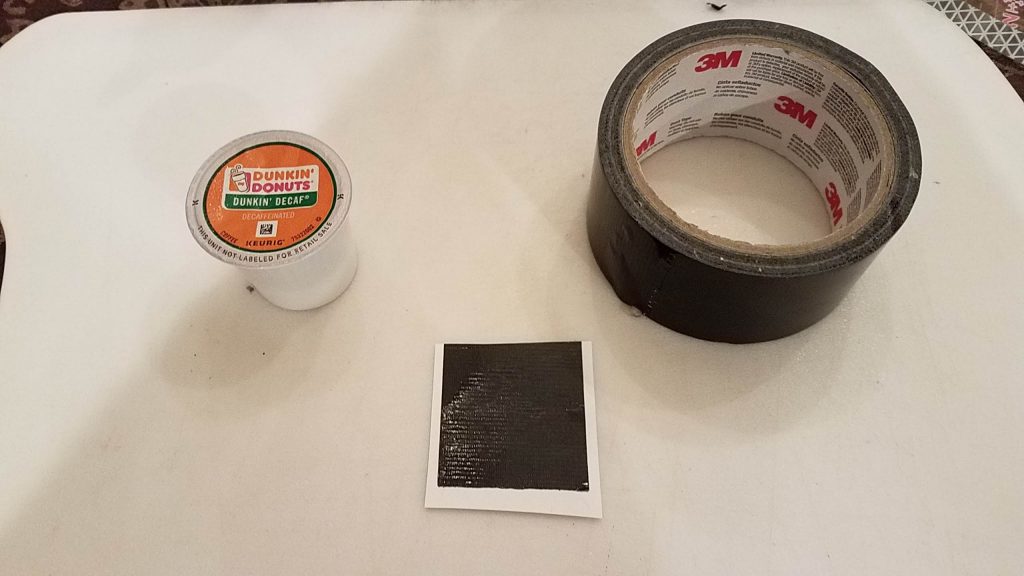
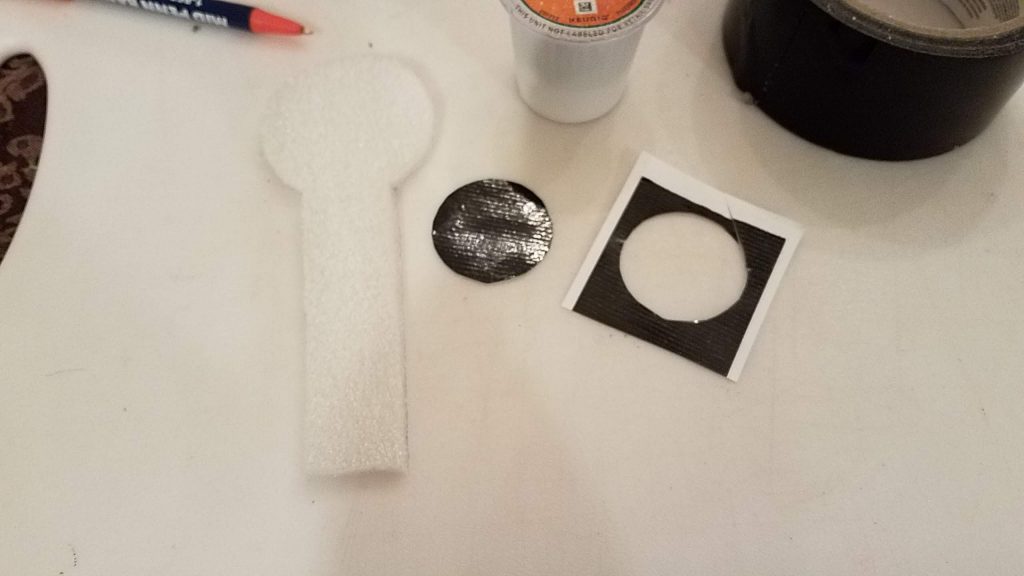
For the circles, get a K-cup, draw a circle. Flip it over, cover it with two layers of duct tape. Flip it over to see the circle again and cut.
Measure out the LED strips to match and lay it on the paper. Do NOT attach yet. Because you bought the weatherproof LED strips, you will be able to bend them easily since the weatherproofing rubber is bendy.
Cut the LED strips to size, making sure you’re cutting in the right spots. LED lights can only be cut like every third light at certain spots. So look at the LED strip and look for the cut lines. Don’t worry if your LED strip is a little shorter than your paper – it doesn’t matter in the long run.
There are plenty of videos on the internet explaining that step.
Now connect the LED strips to the snappy wire connector. This is important – keep track of which way the LED strips are facing. There is a positive and negative side shown on the LED strips. It doesn’t matter if you make red or black is your positive or negative, just keep it consistent. If you don’t keep this consistent, it’ll create confusion in later steps.
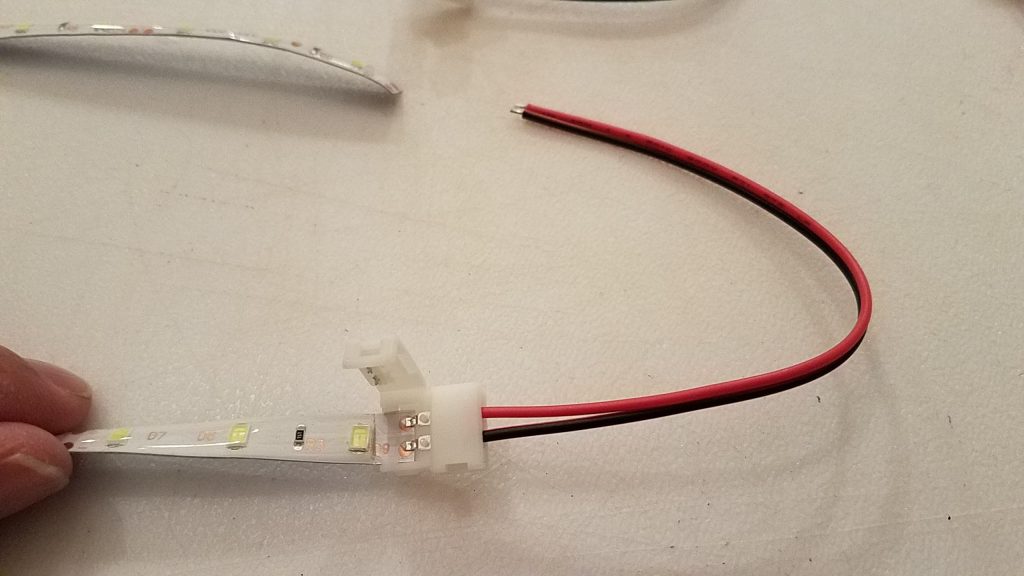
You need to use an Exacto knife to remove the weather stripping exposing two little metal spots where the electricity is conducted. You slide this part of the LED strip into the metal clips seen above. While this step is simple, it’s a little hard sliding the LED strip into here without totally crinkling the LED paper. To help this, don’t remove the adhesive protector from the opposite side. I also had tiny tweezers.
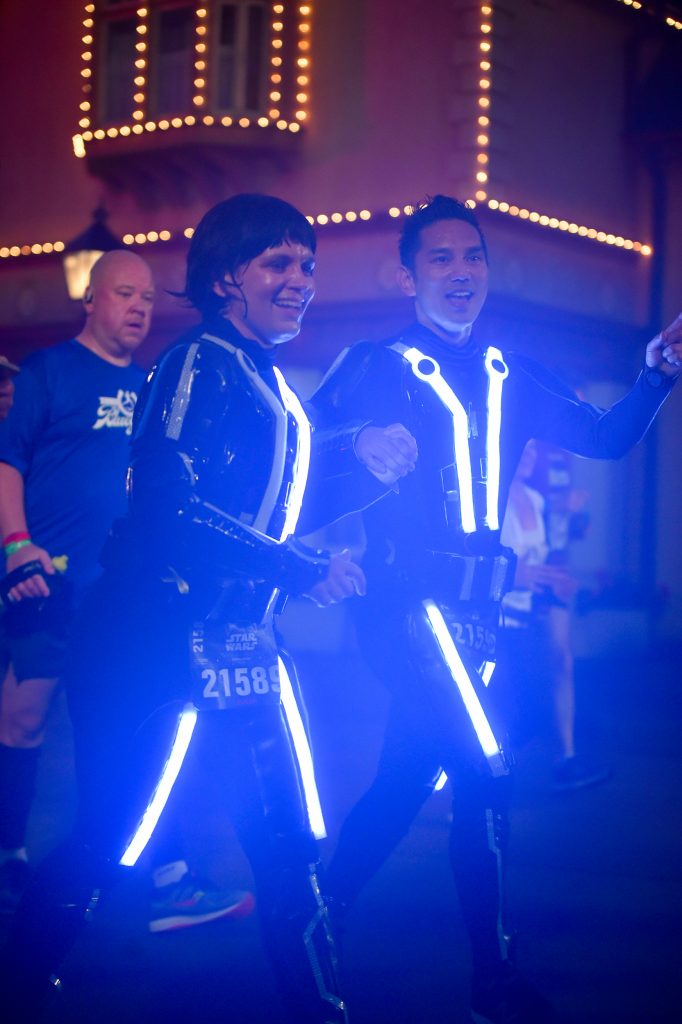
The important thing is to make sure you have a solid connection here or you’re doomed. You’ll notice in our photos, one of the chest lights is out in a bunch of photos. That’s because it was too loose here. You may want to consider adding a little bit of solder on each lead to prevent this from happening to you.
Before you do anything, test it out your connection. Strip your wires like half an inch. You’ll have to cut off one of the sides of the battery wire to strip the wire. Touch the wires together. Since there is a positive side and negative side, you might have to flip what you’re connecting to see if it works.
Don’t worry about getting shocked. It’s like touching a AA battery or something. You never see sparks or anything.
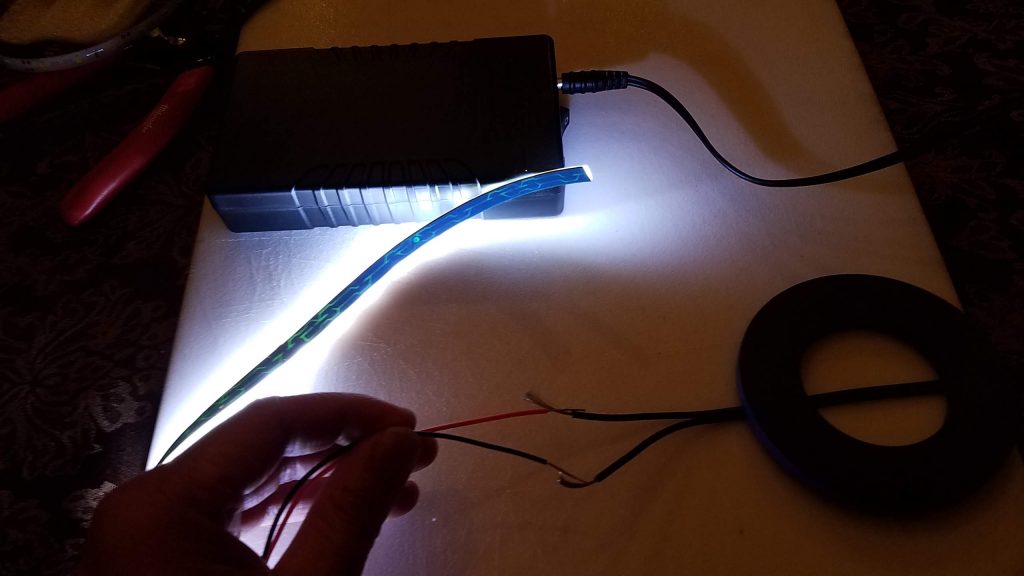
Yay! It works!
Now these wires are really short so you don’t want to stick anything down yet. You will want to add more wire by soldering your existing wire to some of the extra wire you bought on a spool.
So just watch a ton of soldering videos till you’re sure you know what you’re doing. Don’t be scared. I didn’t know anything about soldering before this, it’s simple.
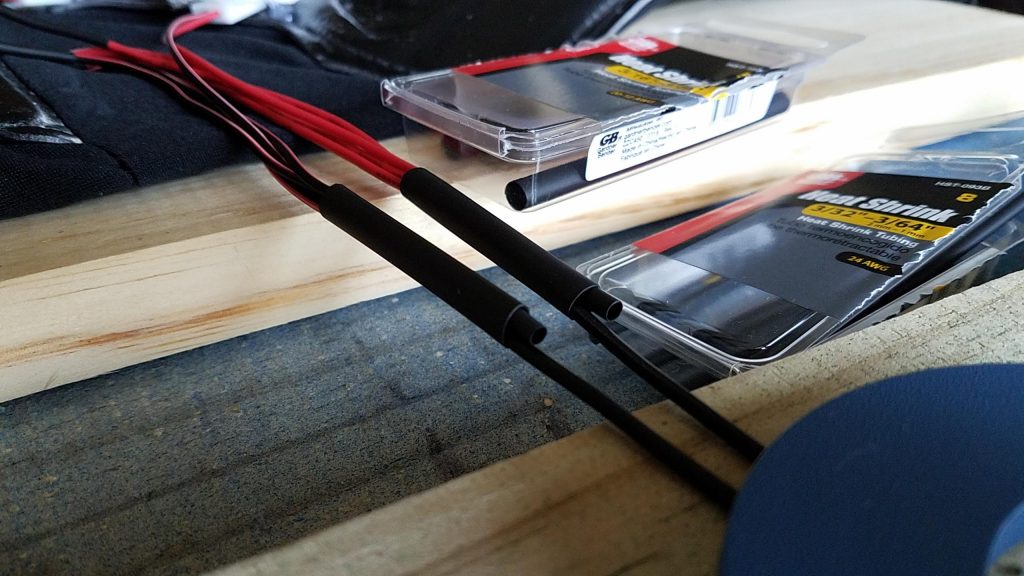
First, slide some of the really thin heat shrink onto the wire and make sure it’s far enough away from the spot you’re soldering so it doesn’t shrink from the soldering iron. Remember this… put on heat shrink before any soldering. If you forget this step, you’ll have to redo your soldering in later steps.
Watch videos on the proper way of winding wires together so they don’t just slide apart. Lock down your wires so they don’t move. Solder.
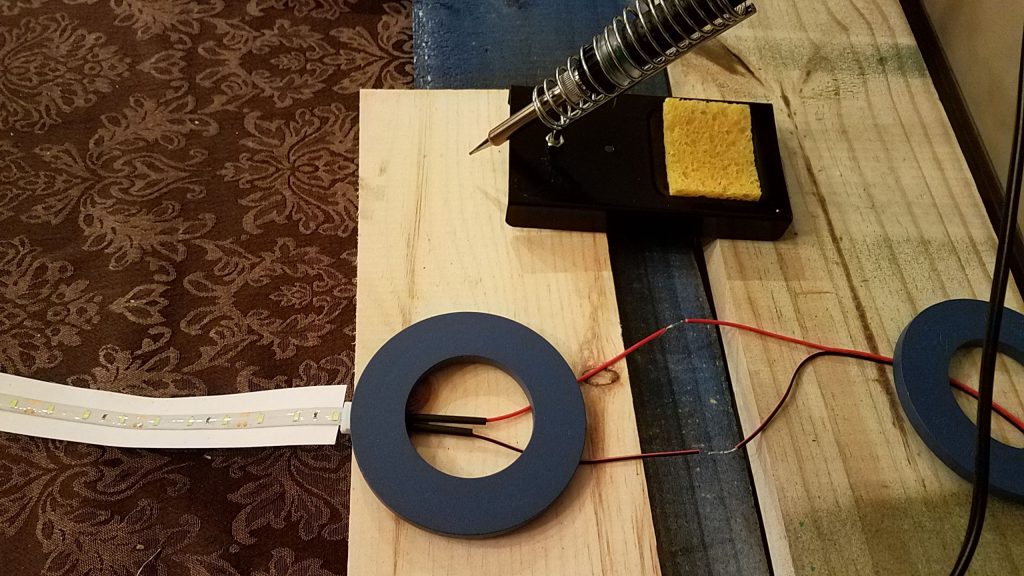
Notice in the above photo I have the heat shrink way to the side so it doesn’t shrink when the heat of the solder travels up the wire.
Now slide the heat shrink over the wires and blow dry.
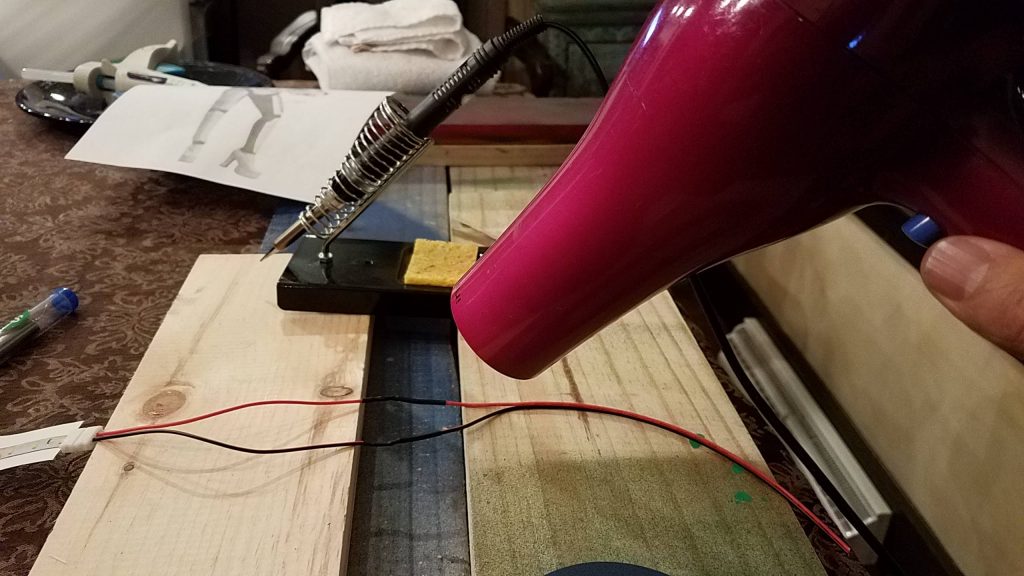
Test your connection again to see if it lights up. If it doesn’t, just cut off the part you just did and try again.
Now that you have plenty of extra wire you can lay down your LED strips.
The LED strips are basically big stickers, so remove the backing (the blue part in the above photo) and stick it to your paper layout. For the legs don’t bother with the paper layout since you’ll just want to do a straight line.
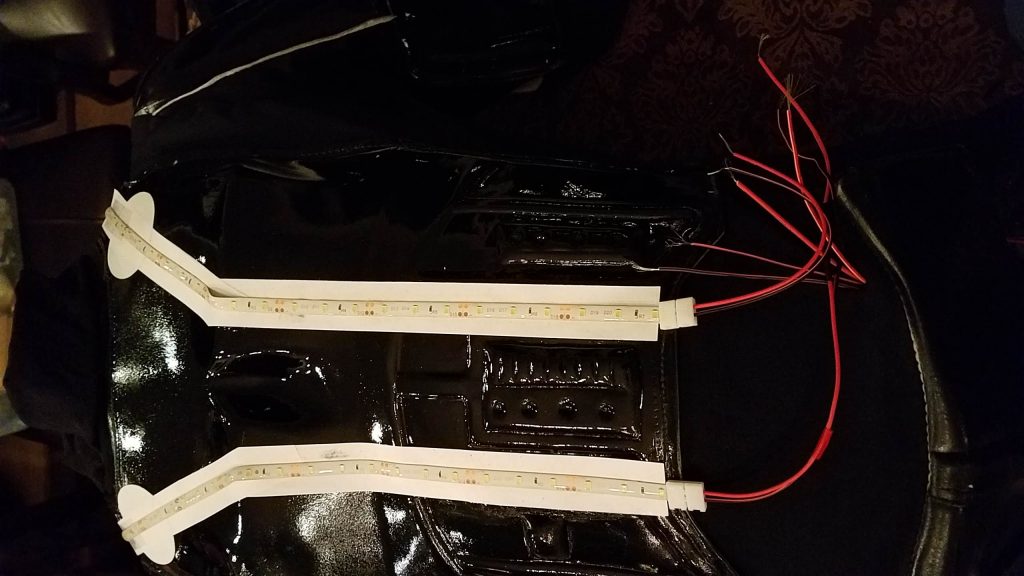
When you bend the LED strip to make an angle, it will raise a bit, ignore that. It’ll get covered up later.
Notice the circle parts. Just run the wire straight through it, the latter diffusing step will make it look like a circle.
Make sure your snap connectors are NOT going past your base like in my photo. You want the least amount of movement for the wires, so keep the entire white plastic clip part solidly on the hard part of your costume.
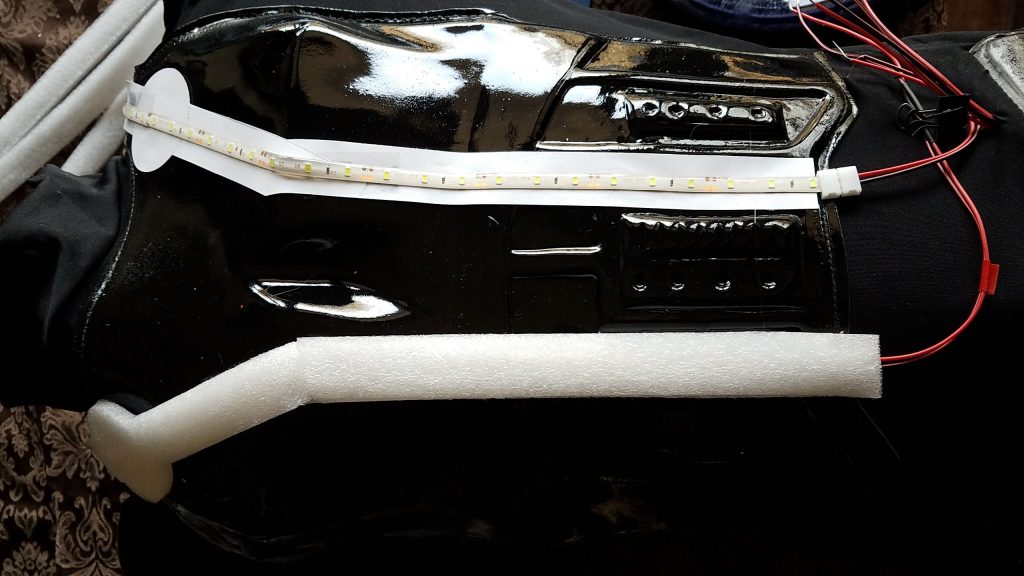
Before you hot glue this part down, make sure you have your lines lined up with whatever you’re doing for your belt. This matters if you’re a Stormtrooper cause the belt has raised and lowers areas. You want to make it easy on yourself and line it up with either one and not halfway in between (like I did).
Do this for all four LED strips of your costume. Make sure you keep track of which color wire is hooked up to the positive or negative sides of the LED strip.
With the legs, since you’re probably just going to do a straight line, skip the paper layout and just hot glue the LED strip to the costume.
To hide the leg wires, we cut a tiny hole right above the thigh plate, went under the pelvis cover and out above it to meet up with the top wires. The thing to remember is: you will do a lot of bending here as you move, so make sure your LED and connector snaps are almost too far onto the hard part of the costume. Absolutely have no bending or movement with that connection. Wires are okay to bend and move. Leave enough slack where that wire moves comfortably.
Now we have to connect all the red wires and all the black wires (if you were consistent). It really doesn’t matter if you messed up the color, just figure which is wire is attached to the positive or negative for each strip.
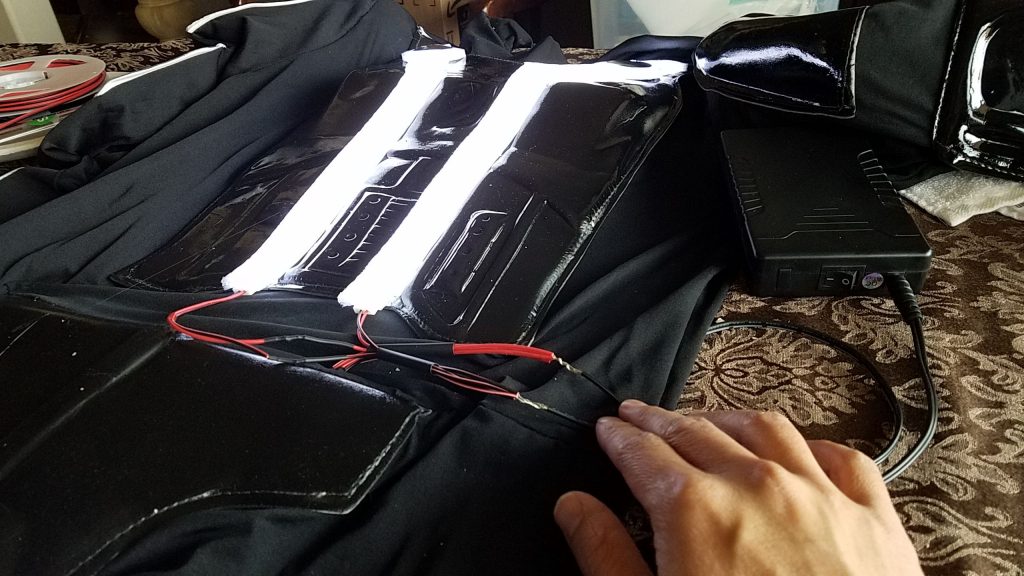
Figure out where all of them are going to meet up. This all depends where you’re going to keep your battery pack. We kept it in the small of our back where it didn’t move at all using the FlipBelt.
Cut the wires to meet up nicely at the same spot, strip them. Test connection.
This next photo already had the diffuser step applied, ignore that for now. We’re just looking at how I tested the four strips.
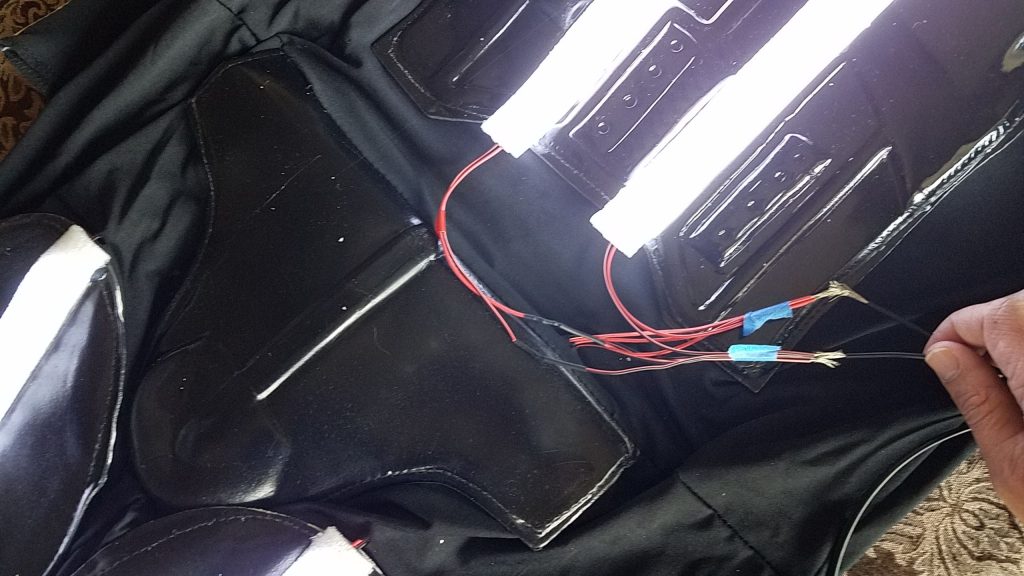
Notice where my leg wire goes under the costume and where it comes out to meet the top wires.
Twist the four positives together. Twist the four negatives together.
Slide on the wider heat shrink over the group of four wires. Slide it way down.
Solder.
Do NOT heat shrink yet.
You put the fatter heat shrink in the previous step, but now on the single wire cut a bit of the thin heat shrink and slide the fat one over both the single battery AND the thin heat shrink ensuring the fat heat shrink has enough to grip.
Heat shrink that sucker.
Then make it really solid by using electrical tape to group then all together.

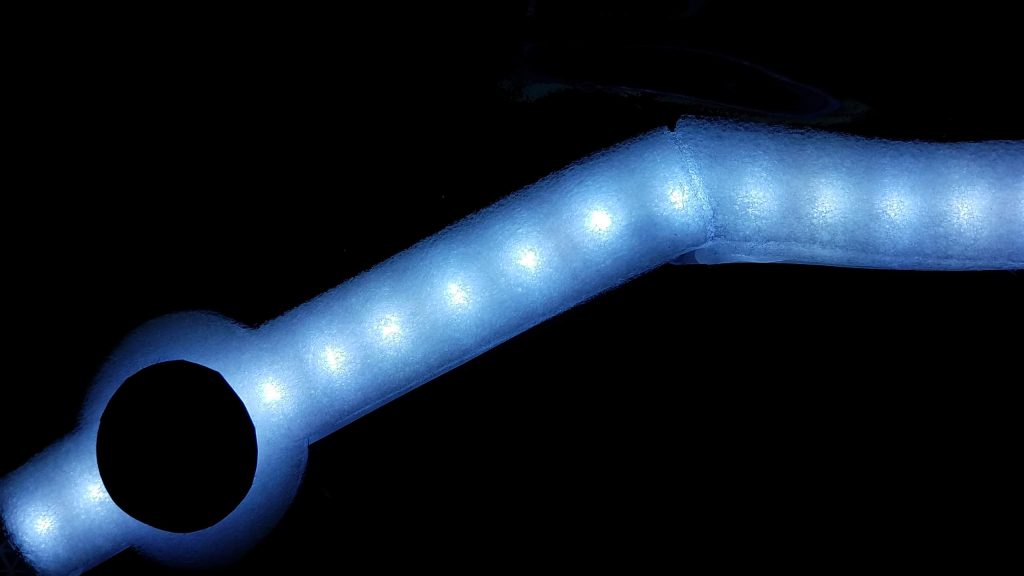
Congratulations! You’re done with the electrical part! Just turn on your battery and you’ll be blinded on how bright the lights really are.
So let’s do something about the lights. The Tron look is a solid line of light, not individual bulbs.
Diffusing the LED Strips
Now we had to cut out the chest diffusers in a previous step because we needed to be precise with the circle parts.
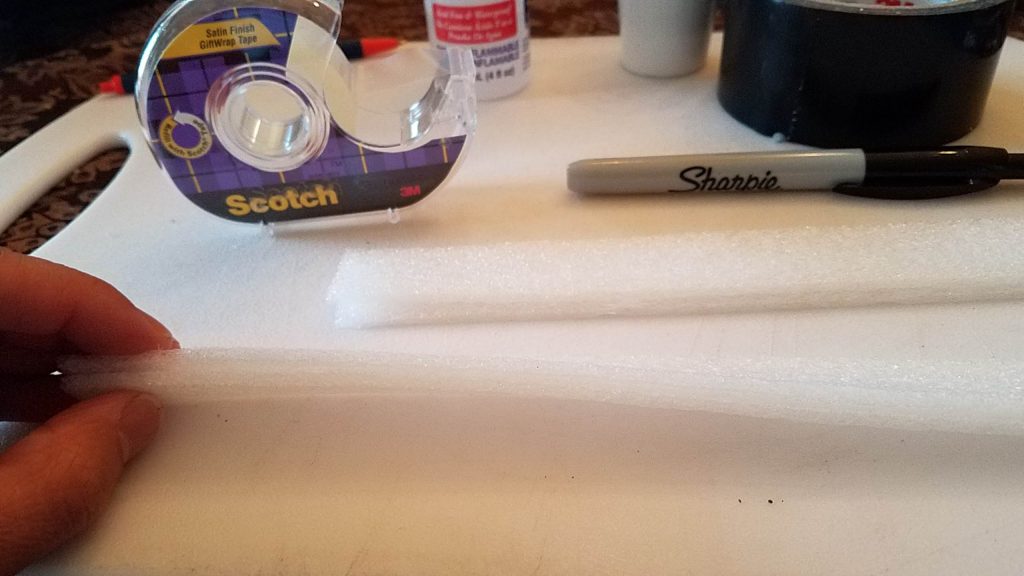
Remember, we used the transparent craft glue to glue the two layers together. Let it sit for a while. And then do your cutting. Do 1-inch width strips.
Then hot glue the combined layers to either side of the LED strips.
You can hot glue right over the snap connectors for more stability.
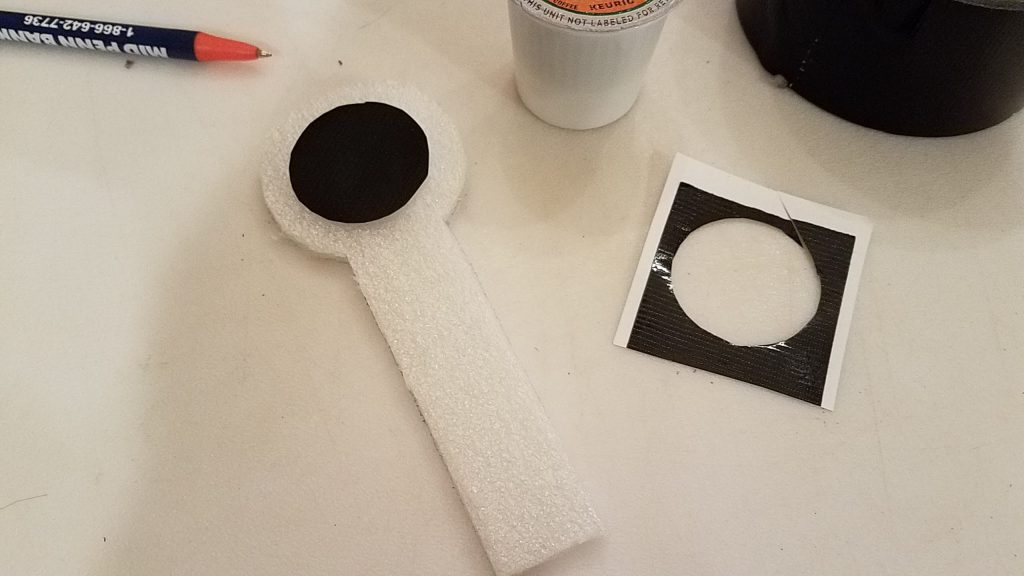
Take the little black circles you made in a previous step and hot glue it.
You’re done with the LEDs!


NOTE!
Remember at the beginning I talked about how we only care about what it looks like in photos and not in real life? In photos, the light will be diffused at a distance of a few feet, but in real life, you’ll still see the individual bulbs. Remember we don’t care about that.
This is what it looks like up close in real life verses just a few feet away to the camera.

Reflective Tape
Finally, an easy part.
Get 1 inch reflective tape.
Use 1-inch strips if you need to continue the LED strip lines anywhere like on your collar bone area, the belt or above or below the thigh.
For the arms, cut the strips into half-inch strips.
You’ll be tempted to center it down the side of the arms. Don’t. Think about the camera. You want it slightly to the front so the camera flash can ‘see’ it better. The reflective tape only reflects light back at the source, so don’t expect ambient light to light up the camera.
This means…
Make sure you set your phone to always use flash during the event!
I will say that again since you might not have understood the gravity of that statement.
Make sure you set your phone to always use flash during the event!
About the line design. Don’t worry about making your angles super clean and where you overlap the cut parts. You’ll never see it from further than a foot away. And everyone will be too blinded by the LED strips.
Just remember, the Tron look are long continuous lines. Don’t make them too angled.
The battery pack will go in the FlipBelt in the small of your back, tuck the wires into the FlipBelt. Your phone will be able to go in the front pouch, and the Stormtrooper belt will cover it all.
You’re done!
Further Notes
It’ll be hard, but not impossible to go to the bathroom. So don’t go around drinking coffee.
The battery pack I bought probably had 80% of charge left after using it for 4 hours straight so you can buy a smaller battery if you don’t need it for near that long. I never felt the battery pack we bought was too heavy.
In the daylight you can tell the strips are lit, but in photos it looks like they’re just white strips. But because your reflective tape is white, people still get the idea. You can see the difference in the second photo where one side is lit and the other failed due to a bad connection.
If someone doesn’t use the camera flash, the reflective tape doesn’t help. So this is what the costumes will look like.
Conclusion
I had a blast making this costume. I mean, come on, it lights up. Running a 10K in this costume was decent. Yeah, it’s not that breathable, but it’s not like wearing other costumes with a bunch of layers for a half-marathon (which we did the next day). With the costume on, it felt like we were running in the upper 80’s or so.
The hardest and longest part of this build was doing weeks of research on EL tape, EL wire, cosplay sites, etc., figuring out what not to do. Once I decided on LED strips, it took about a day to figure it out. So since you don’t have to do all that research, all you need to do is watch a bunch of soldering videos.
I really would like to see someone take what I started an improve on it. If you do so, please send us photos through Facebook or Instagram.